Wireless - Do you secure wireless connections?
Loading last updated info...
Wi-Fi is everywhere now. You can't drive down the street without finding a network which is insecure. However, in an office environment, there is a lot more to lose than a bit of bandwidth. It is vital that wireless is kept secure.
Office Wi-Fi should use WPA3-Enterprise, using RADIUS to securely authenticate users.

❌ Figure: Bad example - Unsecured network (OK for guest networks with a Captive Portal)
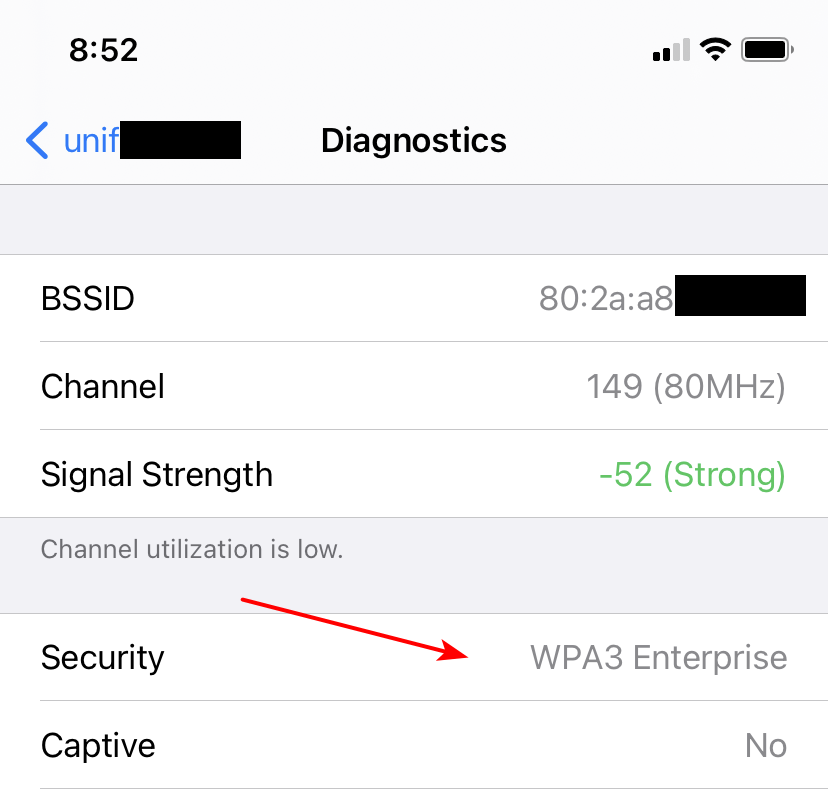
✅ Figure: Good example - WPA3 Enterprise
Some things to note:
- WPA3 has been around for a while, but some devices still have compatibility issues. testing should be done before moving from WPA2 to WPA3
- You should have a separate, isolated guest network, as per: Wireless - Do you provide guests with easy Wi-Fi access?
- You may need other SSIDs as well, for example an IoT network. IoT devices may only be compatible with WPA2 Personal; these networks should be isolated and locked down as appropriate
Setting up enterprise Wi-Fi
Here's an example of how office Wi-Fi can be set up. Note that various authentication methods can be used, such as username/password, smart cards, or certificates.
Requirements
- 802.1X-capable 802.11 wireless access points (APs)
- Active Directory with Group Policy
- Network Policy Server (NPS)
- Active Directory Certificate Services, or a third-party certificate
- Configure Wireless APs
- These steps will vary between vendors
- You'll need to enter:
- NPS server IP address
- Port (default is 1812)
- A shared secret - create a secure password
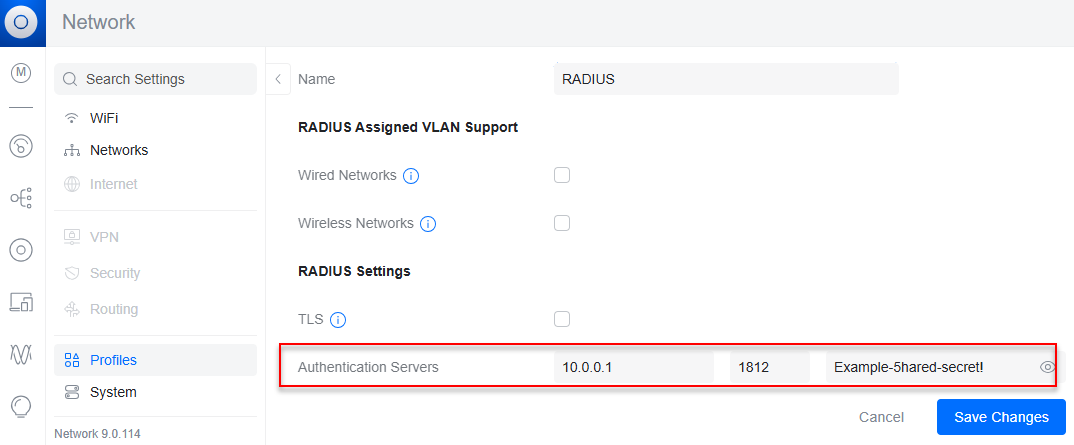
Figure: UniFi RADIUS settings
- Install NPS on your serverOn Windows Server, open server manager and add the Network Policy and Access Services role. Under role services add:
- Network Policy Server
- Routing and Remote Access Services
- Configure Radius Clients on NPS
- Open up the NPS Console
- Right click on Radius Clients | New
- Fill out the fields for Friendly name (e.g. the AP name), IP address, and add the shared secret you configured on your access points
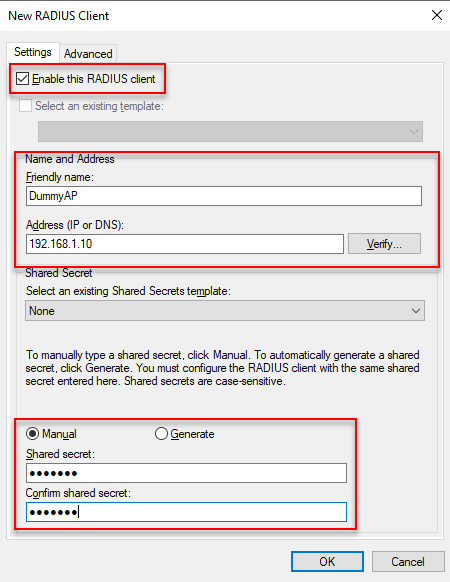
Figure: Radius client settings
- Configure 802.1x on the NPS server
- Click on NPS (Local)
- In the right-hand pane under standard configuration choose Radius Server for 802.1x Wireless or Wired Connections
- Click on Configure 802.1X to start a wizard-based configuration
- Select the top radio button Secure Wireless Connections click next
- On the Specify 802.1X Switches Page, check the APs you have configured under Radius Clients are in that list then click next
- Now the authentication method. From the drop-down lists select Protected EAP (PEAP) NOTE: This method requires a Computer Certificate and the Radius Server and either a computer or user certificate on the client machine
- Select the groups (e.g. Domain\WirelessAccess) you would like to give wireless access to. You can do this by user, computer, or both
- Configure VLANs if needed, or use the defaults
- Register the server with Active Directory - right-click on NPS (Local) and select Register Server in Active Directory
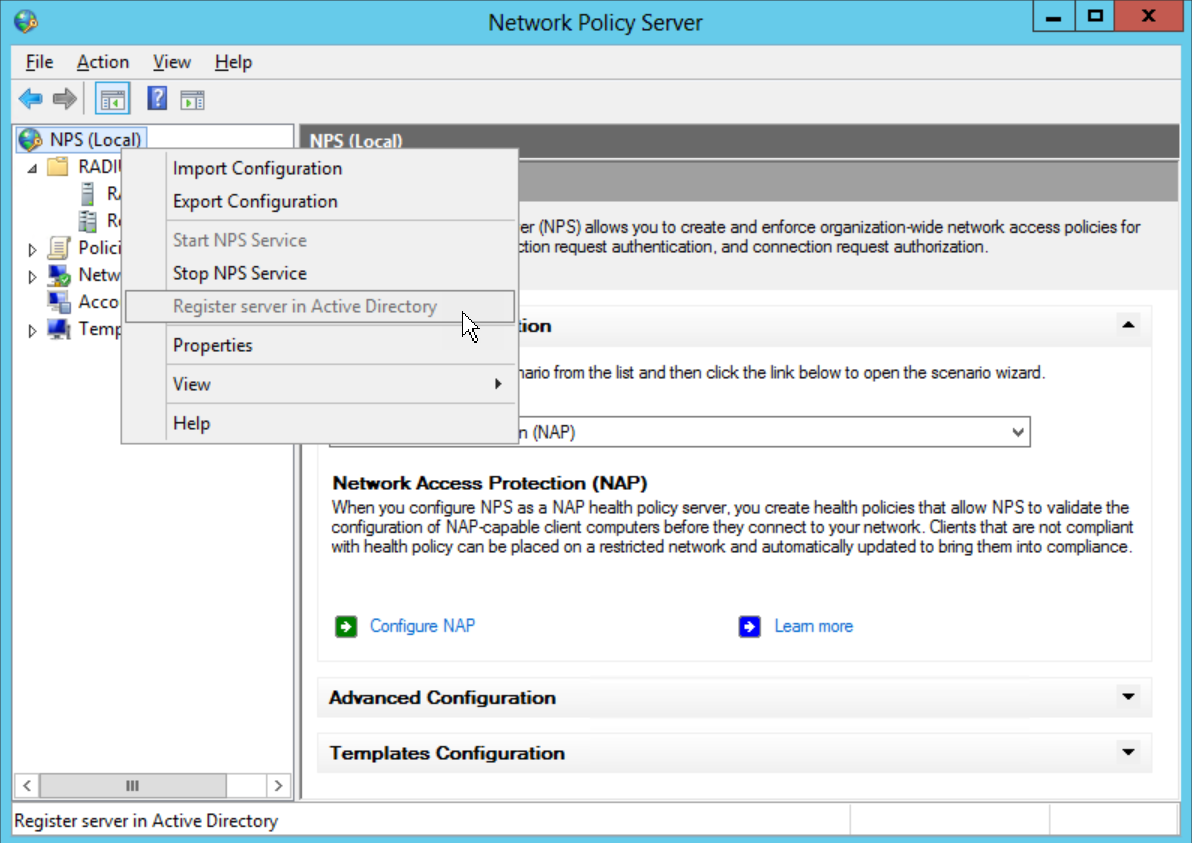
Figure: How to register NPS server with AD
You should now have a Connection Request Policy and a Network Policy.
- Remove the MS-CHAP v1 authentication method from the Network Policy | Constraints tab
- Configure Certificate Auto enrolment
- Open Group Policy Management
- Create a new GPO policy and name it, e.g. "Cert_Enrollment_Wireless"
- Link it to the root of the domain, or a specific OU depending on your needs and OU structure
- Under the security filtering scope, remove Authenticated Users and add the Wi-Fi users group
- Click Edit settings and go to:
- Computer Configuration\Policies\Windows Settings\Security Settings\Public Key Policies
- In the Details pane, right-click the Certificate Services Client – Auto-enrolment and then select properties
- Select enabled from the drop-down menu and check all tick boxes
- Computer Configuration\Policies\Windows Settings\Security Settings\Public Key Policies\Automatic Certificate Request Settings
- Right-click in the details pane and select New | Automatic Certificate Request
- This will open up a wizard and you can select a Computer Certificate
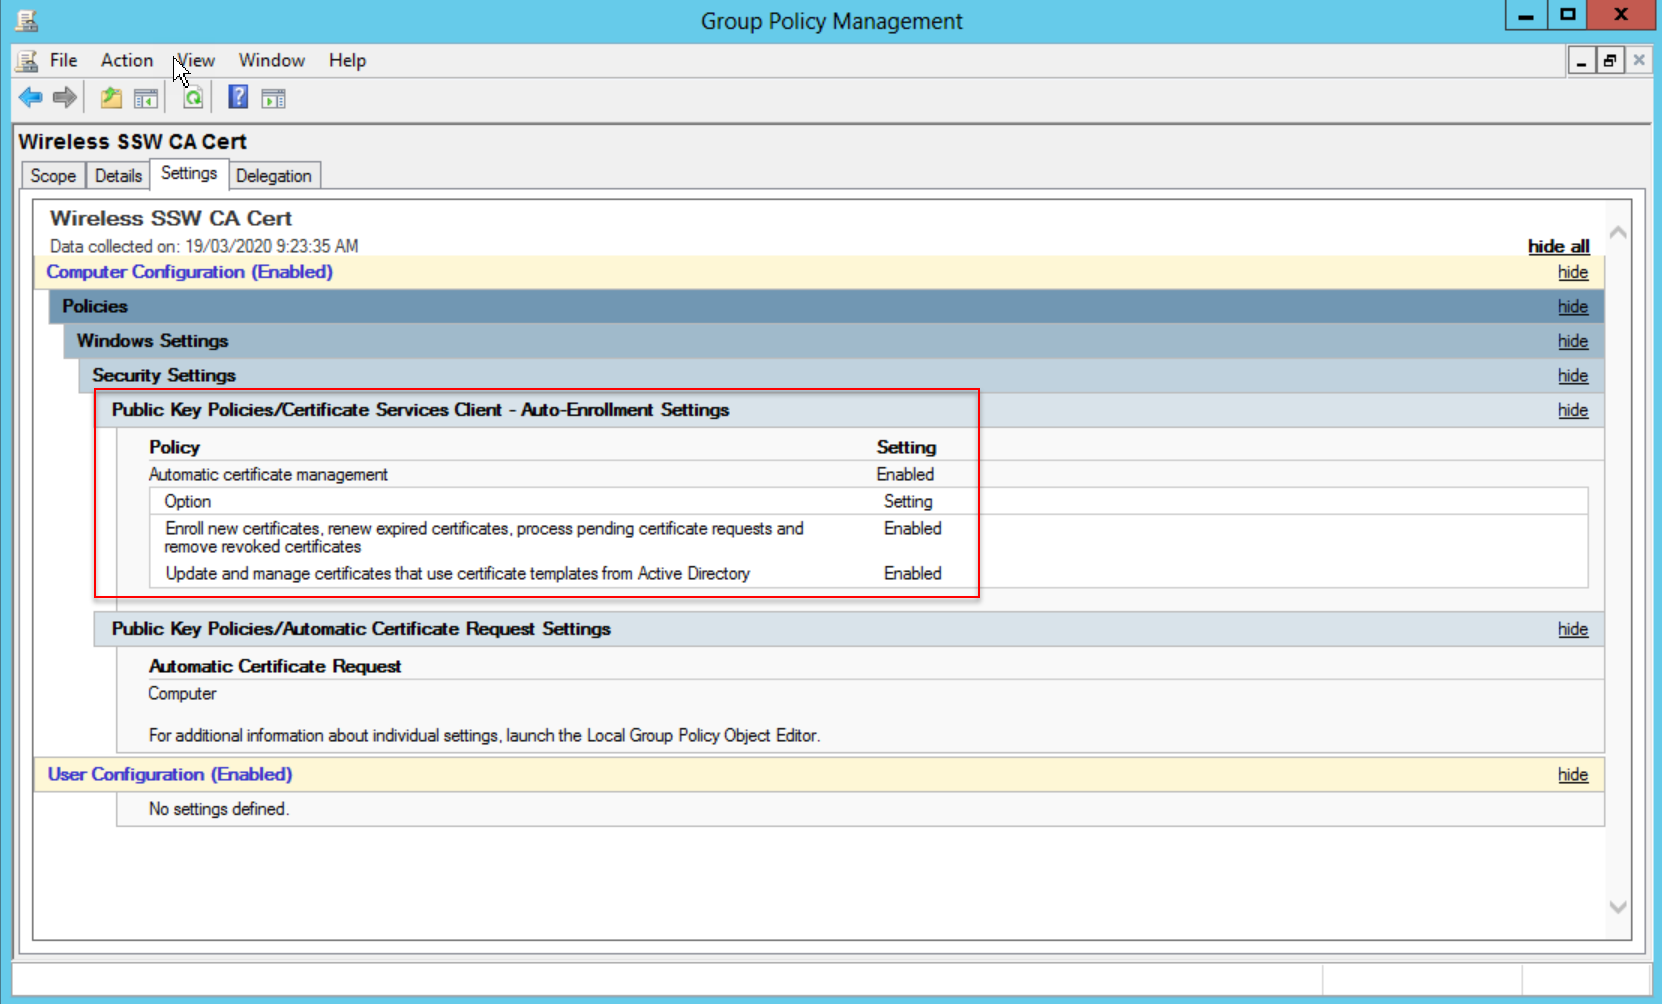
Figure: Group policy settings
- Creating a Windows Wireless 802.1x GPO Policy
- Now go to Computer Configuration\Policies\Windows Settings\Security Settings\Wireless Network (IEEE 802.11) Policies
- Right-click | Create a new policy
- Enter a Policy Name (e.g. WiFi_Settings) and description and link to the root of the domain
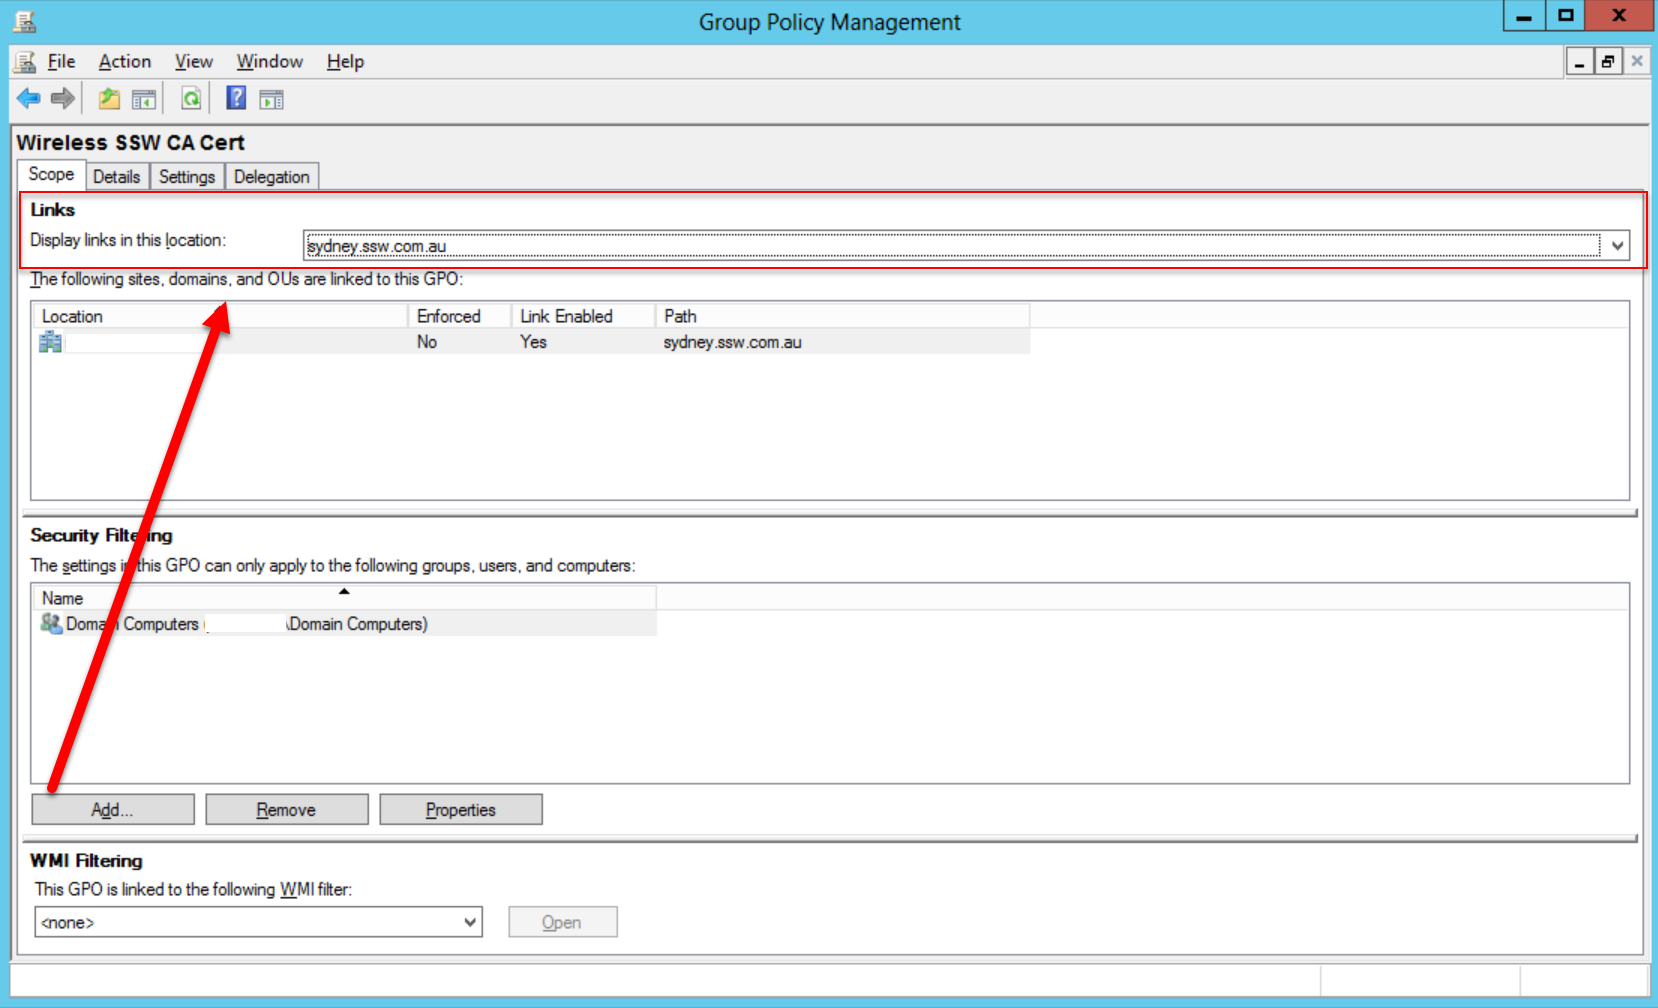
Figure: GP link and scope settings
- Click Add, enter a Profile Name and add the SSID from the Wireless APs
- Make sure the tick box Connect Automatically when this network is in range is ticked
- Click on the Security Tab
- Make sure Authentication is WPA3-Enterprise and Encryption is AES
- Under "Select a network authentication method, choose Microsoft: Protected EAP (PEAP)
- Under Authentication Mode, you need to choose whether you want to authenticate computers and/or users with digital certificates
- Select Computer Authentication
- Click on Properties
- Tick Validate server certificate, tick Connect to these servers, and enter the FQDN of the NPS server
- Under Trusted Root Certification Authority, tick your Root CA certificate
- Click OK
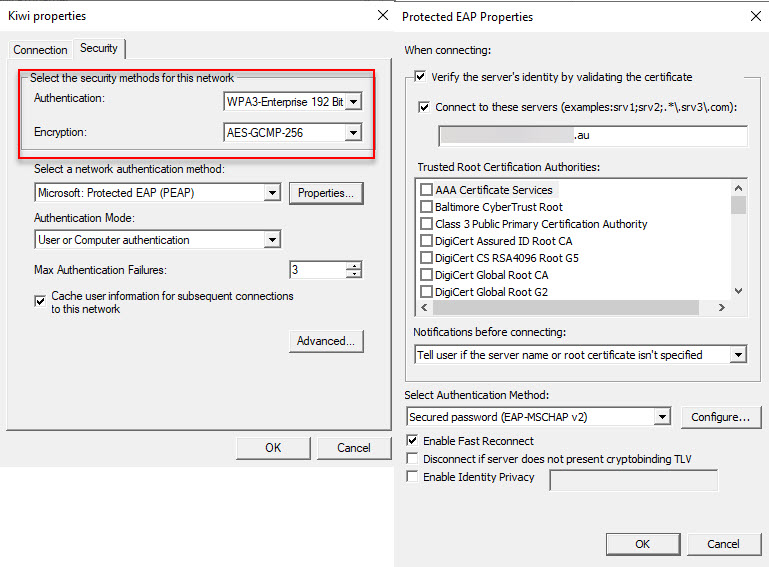
Figure: Connection security settings with WPA3
Optional: Under Network Permission tab you can use the tick boxes to restrict clients to infrastructure networks or only GPO profiled allowed networks if you desire.
- You have completed your Enterprise Wireless Policy
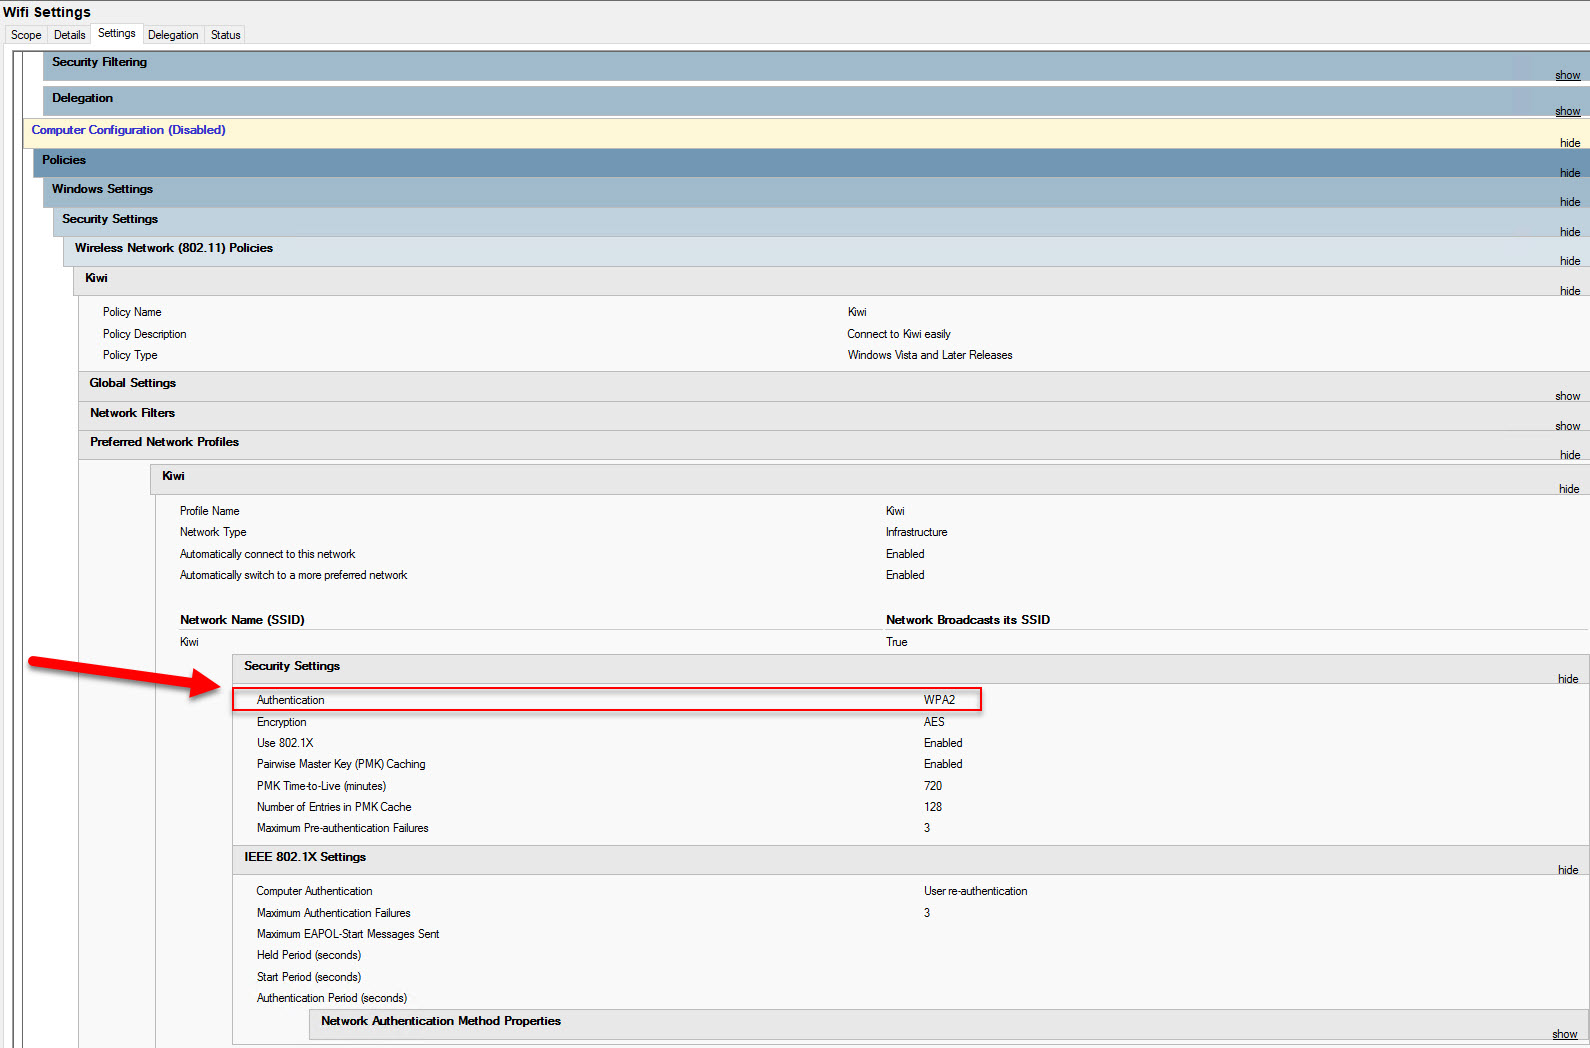
Figure: ✅ OK example - Windows 11 | Group Policy Management | Wifi Settings | Security Settings | Authentication shows WPA2 - aim is WPA3, but some devices are still not ready for it